
A budget-conscious sauna heater install still has to clear three fixed requirements: a correctly sized 240-volt circuit run by a licensed electrician, manufacturer-specified clearances between the guard rail and any combustible surface, and a stable, fire-rated base under the unit. None of these three are places to cut corners, but the labor around them, floor protection, clearance framing, and general prep, can often be done by a reasonably handy homeowner, which is where most of the real savings on a budget install actually come from.
What the Electrical Work Actually Requires
Heaters above roughly 6 kilowatts need a dedicated 240-volt circuit sized to a 30 to 50 amp double-pole breaker depending on wattage, and this part of the job belongs to a licensed electrician in nearly every jurisdiction. Trying to save money here by using an unlicensed installer or reusing an existing circuit not rated for the load is the single most common way a budget install turns into a fire hazard or a failed inspection. Getting one clear quote before ordering the heater, based on the exact model’s amperage draw and the actual distance from the panel, keeps this line item predictable instead of a source of mid-project surprise.
Reading the Clearance Numbers Correctly
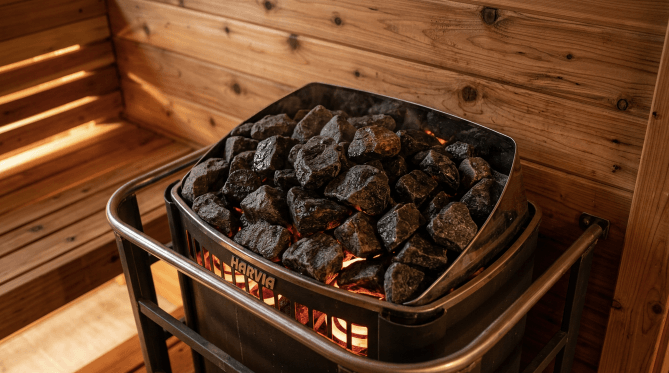
Every heater model publishes its own minimum clearances from the guard rail to nearby walls, benches, and the ceiling, typically somewhere between 3 and 8 inches to the sides and back depending on the unit’s output and shielding. These numbers are not interchangeable between models, and rounding down to fit a tight cabin layout is both a fire-code violation and grounds for a denied warranty claim if something goes wrong. Planning the room’s bench and wall layout around the heater’s actual spec sheet, before cutting or fastening any wood, avoids the expensive fix of reframing a wall after the fact.
Building a Foundation Without Overspending
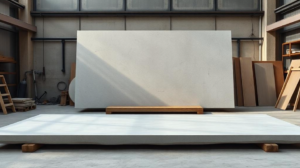
An indoor cabin heater sitting on an existing floor generally just needs a fire-rated protector pad under and slightly around the unit, a low-cost item compared to the rest of the project. An outdoor barrel or cabin sauna is a different job entirely, needing a level pad, a compacted gravel bed, or concrete footings so the structure does not settle unevenly or wick moisture up from wet ground. A gravel pad, poured and leveled by hand over a weekend, is typically the cheapest code-acceptable option for an outdoor unit and holds up as well as a full concrete slab for most residential setups.
What to Hire Out and What to Do Yourself
The circuit and the final electrical connection at the heater belong to a licensed electrician, full stop. Everything else on a typical install, laying a floor protector, building clearance-compliant bench framing, leveling a gravel pad, mounting a guard rail, and loading stones, is reasonable for an attentive DIYer working from the manufacturer’s manual. Splitting the job this way, rather than hiring a full turnkey installer, is where most of the realistic savings on a budget install come from, since labor rather than materials is usually the larger cost on a straightforward job.
Comparing Spec Sheets Before You Buy the Heater
Clearance and amperage requirements vary enough between models that it is worth comparing a few spec sheets side by side before ordering, since a heater with tighter clearances or a lower amperage draw can sometimes fit an existing circuit or a smaller room without any extra electrical work. SweatDecks lists clearance and breaker requirements on individual heater product pages, which is the kind of detail worth checking against your own room and panel before committing to a specific model rather than after it arrives.
Common Installation Shortcuts That Cost More Later
Skipping the fire-rated floor protector to save a small amount, guessing at clearances instead of pulling the actual spec sheet, and using extension cords or non-dedicated circuits for anything above a small 120-volt panel unit are the shortcuts that come up most often and cause the most expensive problems. Each one looks like a modest saving in the moment and turns into a larger cost, a failed inspection, a voided warranty, or in the worst case an actual fire, once something goes wrong. A budget install should trim labor and shop around on materials, not skip the parts of the job that exist for safety.
See also: You’re Going to Stack CJC-1295 Anyway. Here’s How Not to Get Hurt Doing It.
Does a Properly Installed Heater Matter for the Health Case?
The research behind regular sauna use generally assumes consistent, safely delivered heat rather than an improvised setup. A review in Mayo Clinic Proceedings summarized associations between regular sauna bathing and favorable cardiovascular markers across several cohort studies. A separate review in the American Journal of Physiology examined the physiological response to heat exposure specific to sauna bathing. A 2023 follow-up review in Mayo Clinic Proceedings looked at sauna use alongside broader lifestyle habits and found comparable associations. None of this is a reason to overspend on installation, but it is a reason to get the clearances and wiring right the first time rather than treating them as negotiable.
Sequencing the Job So Nothing Gets Redone
Order matters more than most first-time builders expect. Rough-in the electrical circuit first and get it inspected before any wall boards go up, since discovering a clearance problem after paneling means tearing out finished work rather than adjusting a stud layout. Floor protection goes in next, while the room is still open and easy to work in. Bench framing and wall paneling come last, built around the heater’s actual clearance sheet rather than a guess made before the unit arrived. Buyers who order the heater early and confirm its exact model and clearance numbers before framing anything consistently avoid the most expensive kind of rework on this type of project.
What a Realistic Budget Install Adds Up To
For a small indoor cabin heater, a fair planning number is $300 to $600 for the electrical circuit, $50 to $150 for floor protection and a permit, and whatever the heater itself costs on top of that. An outdoor barrel sauna install typically runs higher once a gravel pad or footings are added, often another $200 to $500 depending on site conditions. None of these numbers include the heater unit, which is worth pricing separately against its own kilowatt rating so the electrical and foundation budget is not thrown off by comparing a small heater’s install cost against a larger heater’s price.
Frequently Asked Questions
Can you install a sauna heater yourself to save money? Mounting and stone loading are reasonable DIY tasks. The 240-volt circuit should go to a licensed electrician in almost every jurisdiction.
What clearances does a sauna heater need around it? Roughly 3 to 8 inches from the guard rail to combustible walls, plus a set ceiling distance, both specific to the model’s own spec sheet.
Does a sauna heater need a special foundation? An indoor unit needs a fire-rated floor protector. An outdoor barrel or cabin sauna needs a level pad, gravel bed, or footings.
What is the cheapest way to meet code without cutting corners? Get one precise electrician quote and handle the non-electrical labor, like floor protection and framing, yourself.
References
- Cardiovascular and Other Health Benefits of Sauna Bathing: A Review of the Evidence, Mayo Clinic Proceedings, 2018
- Effects of heat and cold on health, with special reference to Finnish sauna bathing, American Journal of Physiology, 2018
- Does the Combination of Finnish Sauna Bathing and Other Lifestyle Factors Confer Additional Health Benefits? A Review of the Evidence, Mayo Clinic Proceedings, 2023
By Leah Ostrowski